Remanufacturing the
Minolta Color Pageworks Toner Cartridges. (Lexmark SC-1275)
0251
The Minolta Color Pageworks engine was first
released in June 1997. It has been surprising in its staying power
as it is still very popular. The engine itself is a 12ppm Black,
3ppm color 600 Dpi engine. The toner cartridges are very simple to
do. They basically consist of a toner hopper and the developer
roller. The developer roller has a sleeve similar to the Minolta
SP-6 (Epson Action Laser 1500). The same care must be taken not to
damage the sleeve, but other than that, they are very simple to do.
As with most other color lasers, this machine uses a transfer belt
unit. This belt takes the color/black images off the drum and
transfers the finished image on to the paper. The transfer belt unit
is rated for 100,000 pages.
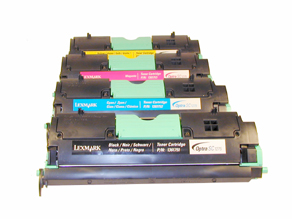
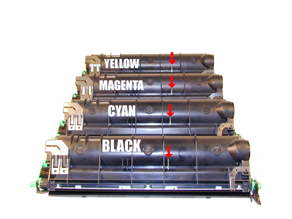
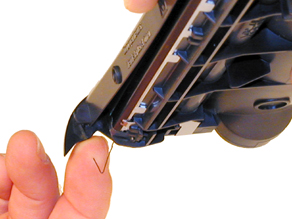
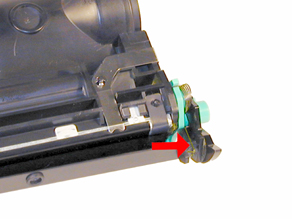
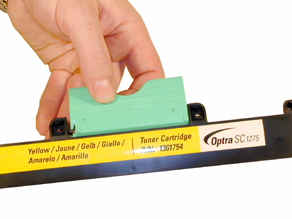
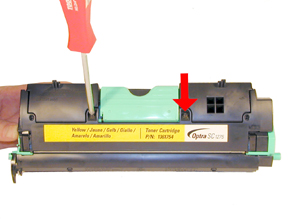
Each color cartridge has a different fin
location that only allows that color cartridge to go into the proper
slot (See Figure 1). Because of this, as well as the fact that it is
virtually impossible to get all the old toner out, we do not
recommend that any cartridges be converted into another color.
Minolta and Lexmark cartridges are not interchangeable. We have
colorized the tabs so you can see the difference better
Each toner cartridge uses a fuse to tell the
printer that a new cartridge has been installed. The fuse is a 5 x
20mm, 80mA 250V Fast acting glass type fuse. This fuse must be
replaced each cycle. The two windows located on each cartridge are
used to determine the toner level. The sensor is in the printer. It
fires a light into the toner cartridge that is reflected back by a
mirror inside the toner cartridge. The amount of light reflected
back determines the amount of toner left. A small LED also lights
up which is reflected back by the cartridge shell. This determines
if a cartridge is present.
The Lexmark cartridges are the:
1361751 Black 4,500 pages @5%
1361752 Cyan 3,500 pages @5%
1361753 Magenta 3,500 pages @5%
1361754 Yellow 3,500 pages @5%
1361750 OPC Drum 20,000 Mono, 5,000 Color pages @5%
The current Minolta cartridges are the:
1710437-001 Black 4,500 pages 5%
1710437-004 Cyan 3,500 pages 5%
1710437-003 Magenta 3,500 pages 5%
1710437-002 Yellow 3,500 pages 5%
1710438-001 OPC Drum 20,000 Mono, 5,000 Color pages @5%
The old Minolta part numbers are the:
1940-501, 0940-701, 0940-401, 0940-601
Machines based on the Minolta Color
Pageworks engine are:
Lexmark Optra SC 1275
Lexmark Optra SC 1275n
Lexmark Optra SC 1275n Solaris
Lexmark Optra SC 5040
Minolta Color PagePro
Minolta Color Pageworks EX
Minolta Color Pageworks EX Plus
Minolta Color Pageworks L
Minolta Color Pageworks LN
Minolta Color Pageworks N
Minolta Color Pageworks Plus
Minolta Color Pageworks PS
Minolta Color Pageworks PS Plus
Machine and cartridge troubleshooting as
well as running test prints are covered at the end of this article.
-
160g Black toner
-
140g Cyan, Magenta, Yellow toner
-
Replacement 5 x 20mm, 80mA, 250V fast
acting glass type fuse
-
Phillips head screwdriver
-
Small common screw driver
-
Phillips head jewelers screwdriver
-
Spring Hook
-
Vacuum approved for toner
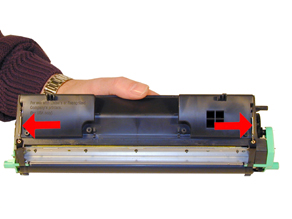
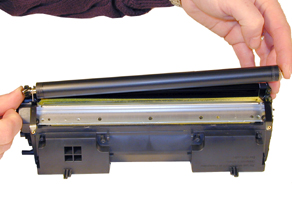
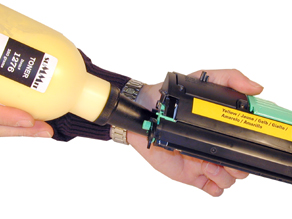
1) Remove the fill plug. Dump out any
remaining toner, and vacuum the chamber as clean as possible. See
Figure 2
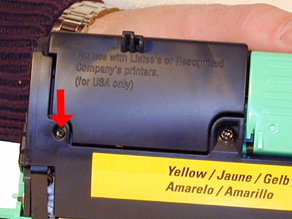
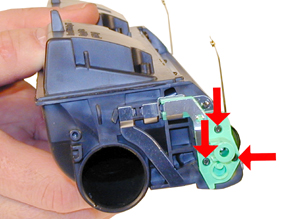
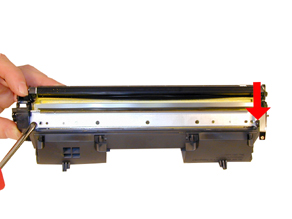
2) Remove the two very small screws on
either side of the top with a Phillips head jewelers screwdriver
See Figure 3
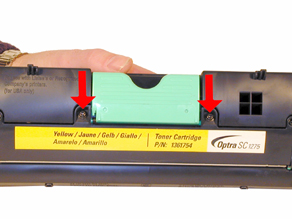
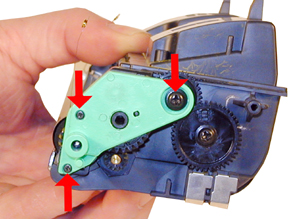
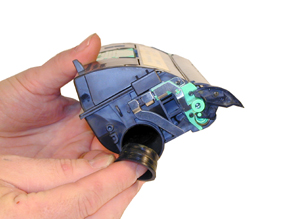
3) Remove the two larger screws from the
top handle area. The top cover will come loose at this point. The
spring loaded handle will also come loose. Be careful not to lose
the spring. Remove the top cover and handle. See Figures 4 & 5
|
|
Figure 1 |
Figure 2 |
|
|
Figure 3 |
Figure 4 |
4) Lift up on the left side (non-gear
side) of the developer roller cover and remove. See Figure 6
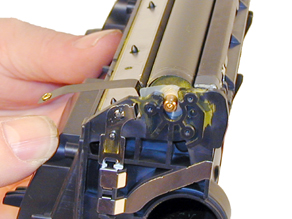
5) On the opposite side, release the
spring from the cover. Remove the cover and spring. See Figures 7
& 8
|
|
Figure 5 |
Figure 6 |
|
|
Figure 7 |
Figure 8 |
6) Remove the two tension springs on
either side of the developer roller. See Figure 9
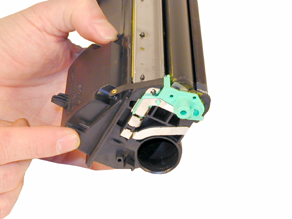
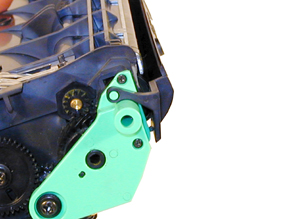
7) Remove the three very small screws from
the smaller green end cap with the Phillips head jewelers
screwdriver. Remove the end cap. See Figure 10
8) On the opposite side, two very small
and one large screw from the large green end cap. Remove the end
cap. See Figure 11
9) Remove the developer roller assembly.
Be very careful not to damage the sleeve, it is very fragile. Do
not clean the sleeve with any chemicals; carefully wipe it off
with a clean lint free cloth only. Be careful not to lose the
drive gear or spacers. See Figure 12.
|
|
Figure 9 |
Figure 10 |
|
|
Figure 11 |
Figure 12 |
10) Remove the large double drive gear.
This gear is easily lost. See Figure 13
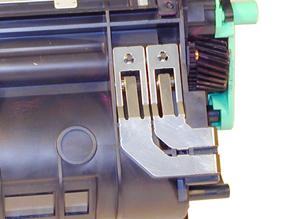
11) Remove the two screws from the doctor
blade. Carefully lift the blade up,(but do not remove) so that any
remaining toner can be removed. Be very careful not to tear the
foam seals attached to the blade. Clean any toner buildup on the
edge of the doctor blade with a foam swab. It can be cleaned with
alcohol, but make sure it is dry before re-installing. Also make
sure not to drip any alcohol into the cartridge. See Figures 14 &
15
12) Re-install the doctor blade and two
screws. Be careful not to damage the seals, and make sure the
metal blade on the right side is making contact with the blade.
See Figure 16
|
|
Figure 13 |
Figure 14 |
|
|
Figure 15 |
Figure 16 |
13) Install the cleaned developer roller
assembly into the chamber. Be careful not to damage the thin
plastic shims on either side of the roller. See Figures 17 & 18
NOTE: It is very easy to get grease
from the gears on your fingers, and accidentally transfer it to
the developer roller. Be very careful not to do this. If it does
happen, the roller should be replaced. Cleaning it with any type
of solvent, will most likely strip part of the coating off the
sleeve, and cause print defects.
14) Install the large double drive gear.
See Figure 19
15) Install the large end cap on the gear
side of the cartridge and three screws. Make sure that the long
plastic finger is over the developer roller tape tensioner. See
Figures 20 & 21
|
|
Figure 17 |
Figure 18 |
|
|
Figure 19 |
Figure 20 |
16) Install the small end cap and three
screws. Also make sure the long finger is over the developer
roller tape tensioner. See Figure 22
17) Install the two large springs on the
tape tensioners. See Figure 23
18) Install the coil spring on the end
cap. See Figure 24
|
|
Figure 21 |
Figure 22 |
|
|
|
Figure 23 |
Figure 24 |
19) Install the developer roller cover
onto both posts. Make sure the spring is engaged properly. See
Figures 25 & 26
20) Set the spring on the top cover
handle. Install the top cover so that the handle spring is loaded
properly. See Figures 27 & 28
|
|
Figure 25 |
Figure 26 |
|
|
|
Figure 27 |
Figure 28 |
21) Install the two large screws on the
top cover first and then the two small screws. See Figures 29 &
30
22) Fill with 160g black or 140g color
toner. See Figure 31
23) Install the fill plug, check for
leaks. See Figure 32
24) Install the replacement fuse by gently
prying the two contacts up from the cartridge. Pry them up from
the flat contact side, and lift up. If you pry them up from the
post side, the post may break, making the cartridge almost
useless. See Figures 33 & 34
|
|

|
Figure 29 |
Figure 30 |
|
|
|
Figure 31 |
Figure 32 |
|

|
|
Figure 33 |
Figure 34 |
Make sure the READY light is on.
Press the MENU button until Utilities
MENU appears on the display.
Press SELECT
Press the MENU button until either PRINT
FONTS or PRINT MENUS appears on the display. Choose the page you
want to print, and Press SELECT.
The chosen page will print out.
There is really not much that can go wrong
with these cartridges. Most of the problems come from either the
developer roller or the DR. blade. Streaking, shading,
back-grounding...all can come from these two parts. Make sure they
are clean, and not damaged.
Machine Troubleshooting
As with most machines these days, most of the error codes
are in plain English. There are however, a few messages that are
numeric. They are as follows:
920: Fuser error
930: Print head (laser) error
944-954: Controller card error
960-965: Emulation error
977: Network card error
© 2003-2004 Summit Laser Products, Inc.
Any attempt to reproduce any part of these instructions without the written
consent of Summit Laser Products, Inc is prohibited. All registered trademarks
are the property of their respective owners.

|