Remanufacturing
the Samsung SF-830 Toner Cartridges
0311
First released in February 2002, the Samsung SF-830 Engine is a
12 ppm fax engine that runs at 600 dpi. The Samsung toner cartridge
SCX-5312D6 is rated for 7,500 pages at 4% coverage, and has a list
price of $129.00 USD. This engine represents a change for Samsung
in that the toner and drum have been split into two different cartridges.
This instruction covers the toner cartridge only. The drum unit
will be covered at a later date. The toner cartridge itself is a
very simple cartridge to remanufacture.
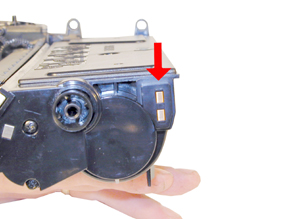
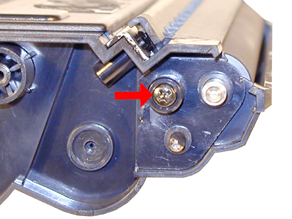
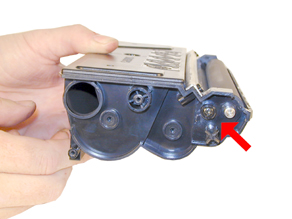
One of the error messages that these machines can show is “Invalid
cartridge”. Since these cartridges do not have a chip, this
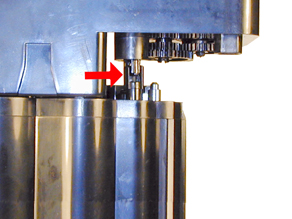
made us curious, and we started to look around. On the gear side
of the cartridge there is a small black plastic piece with two metal
contacts. This piece can be pried out, and inside (on the Samsung
SCX-5312D6 cartridge), there is a 30K ohm resistor. The Xerox cartridge
uses a 12K ohm resistor. See Figures 1 & 2. It appears that
the machine looks for a certain resistance to determine the cartridge
brand. That is how it determines if the cartridge is correct or
not. If the wrong resistor is present, the “Invalid cartridge”
message will show. This is a very easy and inexpensive way to build
cartridges for other companies. No different plastic molds, or anything
else. They could even have the same production line. At the end
of the line, the cartridges could be funneled off into the last
section where these small encoding parts are installed. Only the
very end of the line would be different. Much less expensive than
retooling the production line for each manufacturer. The resistor
does not go bad, it does not blow as a fuse would. It seems only
to be there for identification purposes.
The Samsung cartridge resistor has a color code of Orange, Black,
Orange, Gold. This code means the resistor has a value of 30K ohms
at 5% tolerance.
The Xerox cartridge resistor has a color code of Brown, Red, Black,
Red, Gold. This code means that the resistor has a value of 12K
ohms at 1% tolerance.
The SCX-5312 machines have “Save” functions for both
toner and paper. The toner save mode is basically just like the
Economode method used by other manufacturers. Only half the dots
are printed using less toner. The paper save mode prints two pages
on every sheet, so that less paper is used.
There is one interesting and somewhat strange thing about the SCX-5312
machines. The 5312 will still print after the toner is empty. This
includes faxes! There is a window in the top of the cartridge which
we assumed that was the normal toner low backup for fax machines.
The user manual however states that blank pages will print from
both the printer and fax if the toner runs out.
Current Machines based on the SF-830 engine are:
(All the Samsung machines so far use the SCX-5312D6 cartridge)
Samsung SCX-5112
Samsung SCX-5312F
Samsung SCX-5315F
Samsung SCX-5115
Samsung SF-830
Samsung SF-835P
Samsung Msys 830
Samsung Msys 835P
(All the Xerox machines so far use the 106R584 cartridge)
Xerox WorkCentre Pro 412
Xerox FaxCentre F12
Xerox WorkCentre M15
Xerox WorkCentre M15i
Xerox WorkCentre 312
Xerox WorkCentre Pro 412
Machine and cartridge troubleshooting are covered at the end of
this article.
- 250g dedicated SF-830 toner
- White lithium grease
- Phillips head screwdriver
- Small common screw driver
- Spring Hook
- Vacuum approved for toner
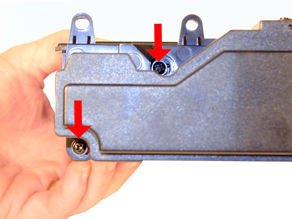
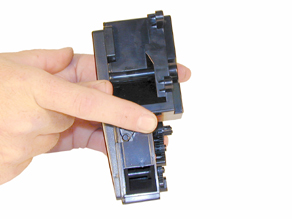
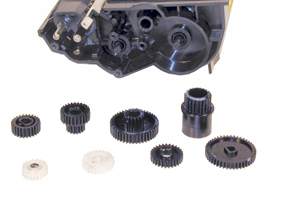
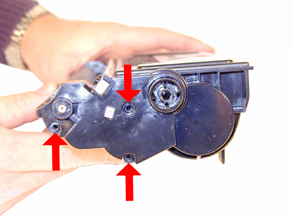
1) Remove the two screws located on the waste chamber. Remove the
waste chamber. Be careful not to lose the gears! See Figure’s
3 & 4
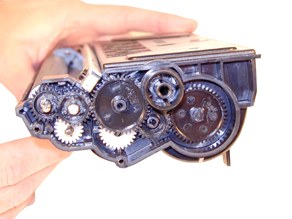
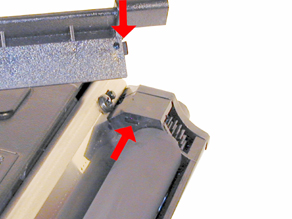
2) Remove the gears from the waste chamber, open the spring loaded
cover. See Figure’s 5 & 6
|
|
Figure
3 |
Figure 4 |
|
|
Figure
5 |
Figure 6 |
3) Vacuum/blow out the waste chamber clean.
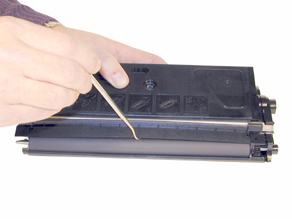
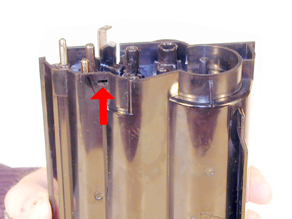
4) On the same side of the cartridge as the waste chamber, remove
the toner fill plug. See Figure 7
5) Dump the bulk of the remaining toner out of the cartridge. Vacuum/blow
out the toner supply chamber clean. It is not necessary to get the
cartridge completely clean now, as the developer roller needs to
come out so the Dr. Blade can be cleaned. You will have easy access
to clean out the hopper then.
6) Remove the waste chamber drive gear. See Figure 8
7) Remove the small developer roller screw and end cap. See Figure
9
8) With a spring hook, been up the middle of the developer roller
cover, and remove from the cartridge. The cover has a small plastic
tab that locks it in place on each side. See Figure 10.
|
|
Figure
7 |
Figure 8 |
|
|
Figure
9 |
Figure 10 |
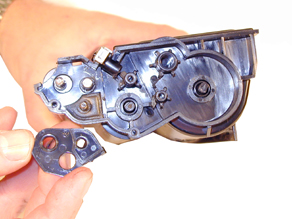
9) Remove the three screws from the opposite side end cap. See
Figure 11.
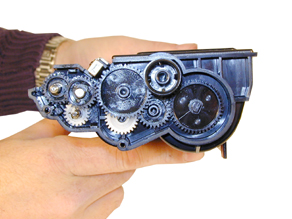
10) Note the location and placement of the gears, and remove them.
See Figure’s 12 & 13.
11) Remove the small internal end cap from the gear side, on the
developer roller shaft. Although it is not necessary to remove this
piece for the roller to come out, if it is not removed, it will
bend, and most likely cause a leak. To remove it, press in on a
small tab, and pry it out. See Figure’s 14 & 15
|
|
Figure
11 |
Figure 12 |
|
|
Figure
13 |
Figure 14 |
|
Figure
15 |
12) Lift the developer roller out of the cartridge. See Figure
16
13) Clean out all the remaining toner from the hopper.
14) Clean the Dr. Blade. Until new blades are available, we do
not recommend that this blade be removed, as it is held in place
by an adhesive foam seal under the blade. If the blade is pried
up (not an easy thing to do) the blade will bend, and become useless.
Clean the blade with a cotton swab dampened with alcohol with the
blade in place. Make sure that you do not drip any alcohol into
the cartridge. See Figure 17
15) Install the developer roller. See Figure 18
16) Install the small internal end cap. Make sure it snaps in place.
See Figure 19
|
|
Figure
16 |
Figure 17 |
|
|
Figure
18 |
Figure 19 |
17) Install the developer roller end cap, screw, and drive gear
on the waste chamber side. See Figure 20
18) Clean the old grease off the gears and replace with new. We
recommend white lithium grease be used.
19) Install the gears, start from left to right, and put the inside
gears in place first. See Figure 21
20) Install the gear end cap and three screws. See Figure 22
21) Install the developer roller cover in the same way it was removed.
Do not bend it at too much of an angle, or it will stay bent. See
Figure 23
|
|
Figure
20 |
Figure 21 |
|
|
Figure
22 |
Figure 23 |
22) Fill with 250g SF-830 toner. See Figure 24
23) Install the fill plug, check for leaks. See Figure 25
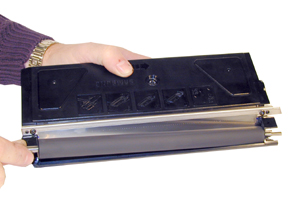
24) Install the waste chamber and two screws. See Figure 26
25) Make sure the waste chamber drive gear is meshed with the waste
chamber gears. See Figure 27
|
|
Figure
24 |
Figure 25 |
|
|
|
Figure 26 |
Figure 27 |
There is really not much that can go wrong with these cartridges.
It is still too early to tell yet, but most of the problems will
probably come from either the developer roller or the DR. blade.
Streaking, shading, back-grounding...all can come from these two
parts. We will write an update after we have more information
As with most Samsung machines, the error codes are in plain English.
There are however, a few messages that can be confusing (Different
words are used for the same parts). They are as follows:
Drum Warning: The drum cartridge is nearing the
end of its life
Drum Empty: The drum cartridge is finished.
No Developer Cartridge: This means the Drum cartridge
is missing. Actual developer is not used in these machines. I’m
not sure why they didn’t use a “no drum cartridge message”,
but that is why we included the drum messages here.
Invalid cartridge: A non-Samsung cartridge is
installed, or the encoder piece is missing. See text at the beginning
of this article.
© 2003-2004 Summit Laser Products, Inc.
Any attempt to reproduce any part of these instructions without the written
consent of Summit Laser Products, Inc is prohibited. All registered trademarks
are the property of their respective owners.

|