Re-manufacturing
the Konica Minolta PagePro 1350W Toner Cartridge
0345
The Konica Minolta PagePro 1350W was introduced in January 2004.
Based on a Minolta 21ppm, 1200 DPI engine, and with a street price
of less than $180.00 USD (June 2004), these machines are becoming
very popular. The high capacity toner cartridge lists for $129.99
and sells wholesale for around $112.00. As simple as these cartridges
are, there is plenty of room for a nice profit. Laser printers have
now joined ranks with Ink jet machines where a new set of cartridges
costs more than the machine did new!! (New drum units list for $90.00)
Other machines based on this engine are the Konica Minolta PagePro
1300W, and the Epson EPL-6200
-
Minolta PagePro 1350 toner 135g bottle
-
Small bottle of Acetone (Available from your local hardware
store)
-
Toner Magnet cloths
-
Lint-free synthetic cotton 4"x 4" pads
-
99% pure Isopropyl Alcohol
- Cotton Swabs
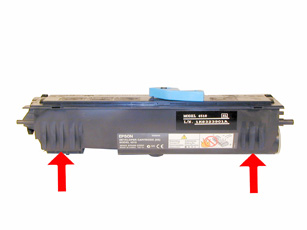
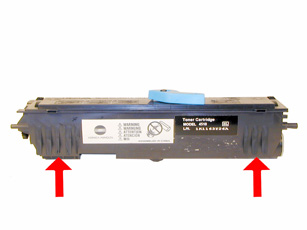
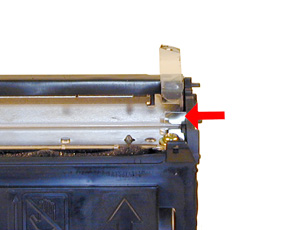
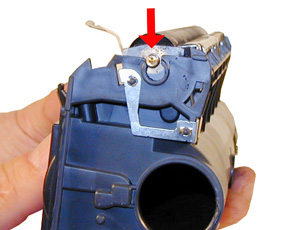
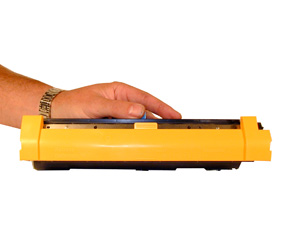
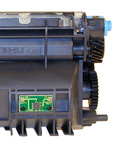
Figures 1 and 2 show the tabs on the Konica Minolta cartridge and
the Epson EPL-6200 cartridge. Although in the past this is how Minolta
would differentiate between different brands, they are now identical.
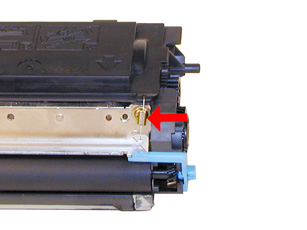
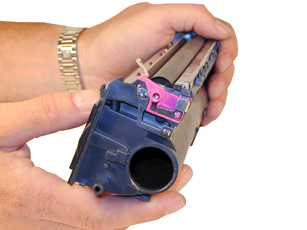
The difference is in the chip. See Figure 3
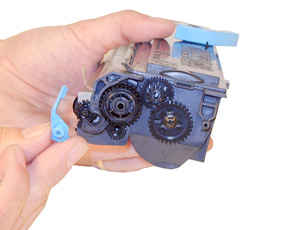
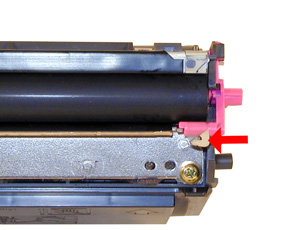
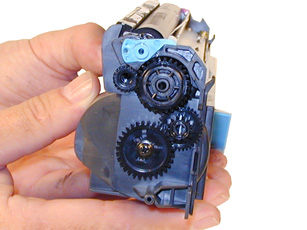
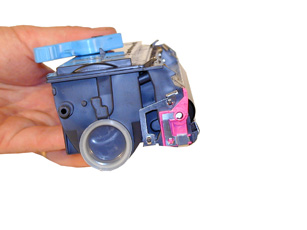
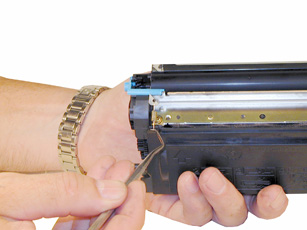
1) Remove the fill plug on the end of the cartridge. Dump the old
toner out and discard. Vacuum the outside of the housing and the
developer roller. Turn the developer roller a few times to vacuum
all sides of the roller. See Figure 4.
|
|
Figure 1 |
Figure 2 |
| 
|
|
Figure 3 |
Figure 4 |
Although we don't recommend it, once clean, you can fill the cartridge
install the plug and you’re done! We don't recommend this
way because the Doctor Blade needs to be cleaned each cycle. Failure
to do this will allow toner to build up on the blade causing vertical
streaks, and eventually a ruined Developer Roller. The best way
is as follows:
2) To fully clean this cartridge, the Developer Roller must be
removed.
3) Remove both springs from each side of the developer roller.
See Figures 5 & 6.
4) Remove the blue colored bushing from the left side. See Figure
7
5) Remove the pink bushing from the right side. See Figure 8
|
|
Figure
5 |
Figure
6 |
|
|
Figure
7 |
Figure
8 |
6) Remove the developer roller. See Figure 9
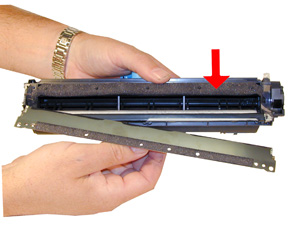
7) Remove the 2 screws from the doctor blade. See Figure 10
8) Remove the doctor blade. Carefully separate the foam seal from
underneath the blade. Be careful not to tear this foam as the cartridge
will leak. See Figure 11
9) Clean any remaining toner dust from the hopper and seals. See
Figure 12
|
|
Figure
9 |
Figure
10 |
|
|
|
Figure
11 |
Figure
12 |
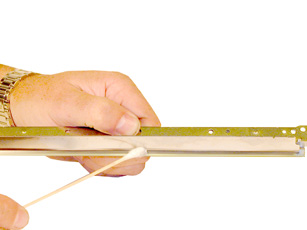
10) Clean the Doctor Blade with a cotton swab and a small amount
of acetone. Remove any remaining residue with another cotton swab
and 99% Isopropyl alcohol. See Figure 13.
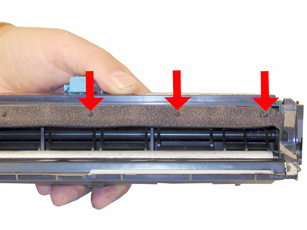
11) Align the foam seal onto the small plastic posts on the hopper.
See Figure 14
12) Install the doctor blade and two screws. Make sure the contact
leaf spring is touching the back side of the blade. See Figures
15 & 16
13) Clean the Developer Roller Sleeve with a lint free cotton cloth,
and place aside.
|
|
Figure
13 |
Figure
14 |
|
|
|
Figure
15 |
Figure
16 |
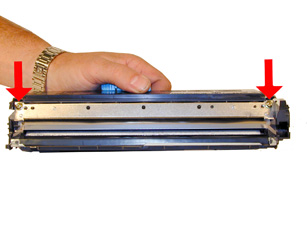
14) Install the developer roller gear side to the left. Make sure
the clear spacers have the flat side down and that they are not
crimped. See Figures 17 & 18
15) Install the pink bushing on the right side of the developer
roller. The clear plastic band should be over the arm of the bushing.
See Figures 19 & 20
|
|
Figure
17 |
Figure
18 |
|
|
|
Figure
19 |
Figure
20 |
16) Install the blue spacer on to the left side of the developer
roller. The clear plastic band should be over the arm of the bushing.
See Figure 21
17) Install the small springs on both sides of the developer roller.
The clear plastic band should be under the bushing. See Figures
22 & 23
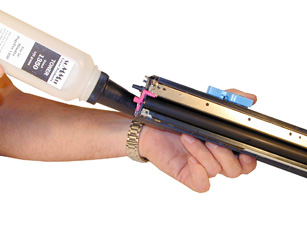
18) Fill the cartridge with 1350 toner (135g). See Figure 24
|
|
Figure
21 |
Figure
22 |
 |
 |
Figure
23 |
Figure 24 |
19) Install the developer roller cover. The clear plastic band
should be under the bushing. See Figure 25
20) Replace the used chip with a new one. Make sure you have the
correct chip for the brand cartridge you need. See Figure 26
© 2003 Summit Laser Products,
Inc. Any attempt to reproduce any part of these instructions without
the written consent of Summit Laser Products, Inc is prohibited.
All registered trademarks are the property of their respective owners.

|