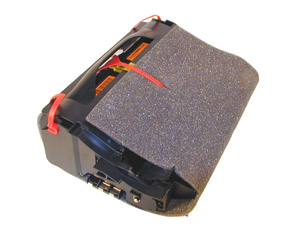
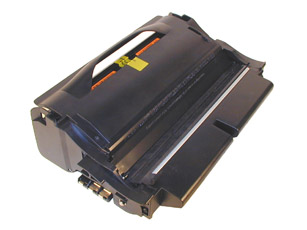
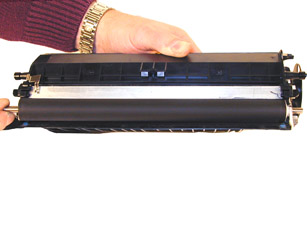
Remanufacturing
the Lexmark T430 Toner Cartridge
0360
The T430 series of printers
use cartridges that look very similar to the T-420; basically they
are a modernized version of it. There are four different cartridges
for these machines. Two high yield, two low yield. Return Program
and Non-Return are available for both.
First released in January 2005, the T430 series are based on the
Lexmark 4048 32ppm, 1200dpi engine. So far only three models have
been released, the T430, T430d, and the T430dn. Both come standard
with duplex capabilities and a fast 366 MHz processor that gets
the first page out in less than 8 seconds. These machines are quite
an upgrade to the T420. The T420 ran at 22ppm, and used a 200MHz
processor.
As stated above, there are actually four cartridges currently available
for these machines. They are as follows:
| Part |
Type |
List$ |
Yield |
| 12A8425 |
High yield Return |
$273.00 |
12,000 |
| 12A8420 |
Standard Return |
$172.00 |
6,000 |
| 12A8325 |
High Yield NON-Return |
$304.00 |
12,000 |
| 12A8320 |
Standard NON-Prebate |
$162.00 |
6,000 |
As with all the newer Lexmark cartridges, the PCR is not in the
cartridge it’s in the printer. The wiper blade inside the
cartridges uses a PCR cleaner to keep the PCR clean. Because these
cartridges use ARD chips, only the Non-Return cartridges can be
remanufactured until new or repair chips are released. It should
also be noted that because of the play between the toner hopper
and the OPC drum, a shipping lock should be installed in every cartridge.
This holds true even if you are going to hand deliver the cartridge.
Taking test prints, as well as some common cartridge/machine problems
will be covered at the end of this article.
-
T430 black toner. Exact gram weights are under investigation
-
Long life OPC Drum (Optional, T420 may work testing is ongoing.
-
Wiper Blade
-
Shipping Lock
-
New White Developer Roller Shims (Optional)
-
Drum lubricant
-
Cotton Swab
-
Isopropyl Alcohol
-
Poly Wipes Cotton Pads
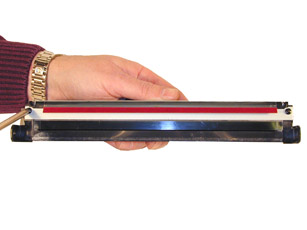
1) Vacuum the exterior of the toner cartridge.
2) Place the cartridge on the bench drum side down, and the toner
supply towards you.
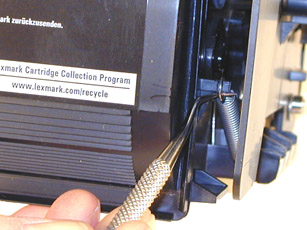
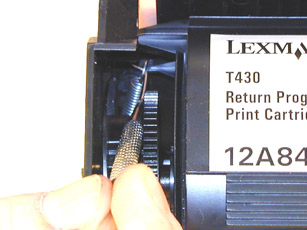
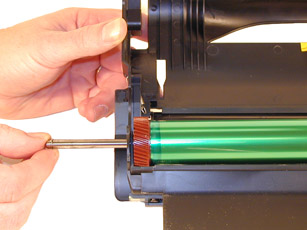
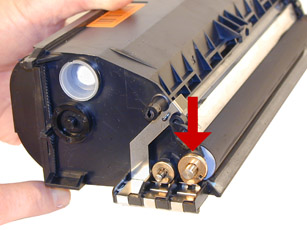
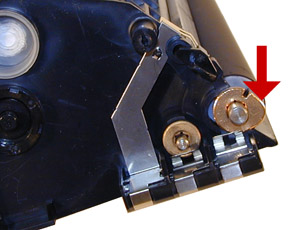
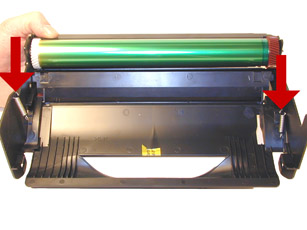
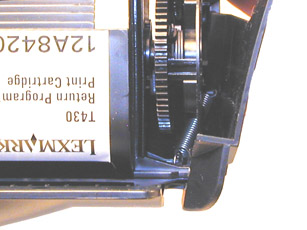
3) With the spring hook, remove the two springs from each end of
the cartridge. The right side is easy to see, the left is somewhat
recessed. See Figures 1 & 2
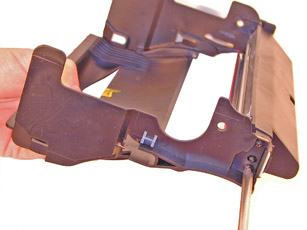
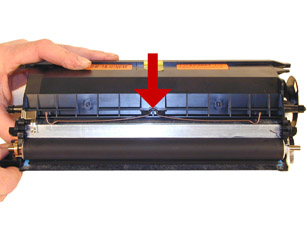
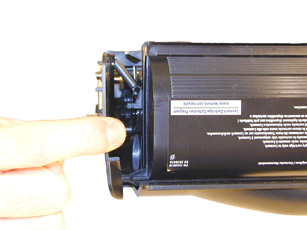
4) Bend out the two side panels to release the hopper. See Figure
3.
5) Remove the E-Ring from the small helical (white) gear end of
the drum
axle. There is no need to remove the other E-ring. See Figure 4
|
|
Figure 1 |
Figure 2 |
| 
|
|
Figure 3 |
Figure 4 |
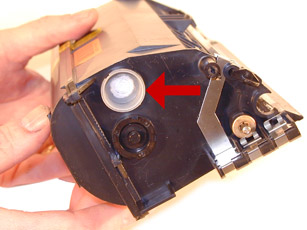
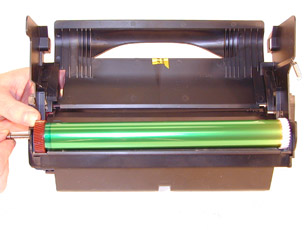
6) Slide the Drum Axle out of the cartridge. See Figure 5
7) Gently lift the Drum and Drum spring up and out of the cartridge,
and place in a light protected area. Be careful not to lose the
spring from the small white gear. Its purpose is to keep the drum
from rotating backwards. See Figure 6
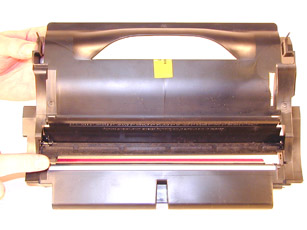
Cleaning out the waste chamber can be done two ways. The easiest
way is to remove the drum cover, and then the two screws, and blade.
The second way is also easy, it just is somewhat more time consuming.
This method entails removing four screws, two from each side of
the cartridge, and then the blade and two screws. The first method
is covered in steps 8-9; the second is covered in steps 10-11
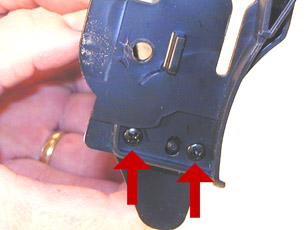
8) FIRST METHOD: To remove the drum cover, Bend the cover out in
the middle of the cover so that the two side pins are released.
See Figure 7.
9) Once the two small pins are released, slide the large tab on
the cover out through the large hole in the side wall of the cartridge.
See Figure 8
|
|
Figure
5 |
Figure
6 |
 |
 |
Figure
7 |
Figure 8 |
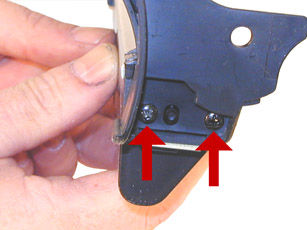
10) SECOND METHOD: Remove the two screws on each
side of the waste chamber. (Four screws total). See Figures 9 &
10.
11) Remove the waste chamber from the cartridge shell.
12) Remove the two screws and the wiper blade, from the waste chamber.
Vacuum it clean.
See Figure 11
13) Make sure the foam seal on the bottom of the wiper blade is
not torn or the cartridge may leak. See Figure 12
|
|
Figure
9 |
Figure
10 |
|
|
|
Figure
11 |
Figure
12 |
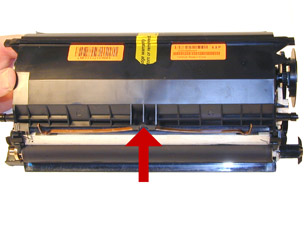
14) Coat the Wiper Blade with your preferred
lubricant, replace the blade and two screws into the cartridge.
See Figure 13
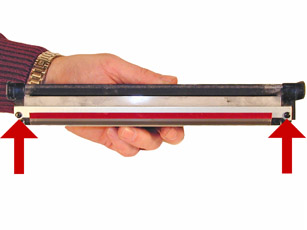
15) Install the waste chamber into the cartridge shell, and install
the 4 screws. See Figure 14
16) If it was removed, install the drum cover. Install the large
tab through the hole, and bend the cover in the middle so that the
pins on both sides fit into their respective holes. See Figure 15
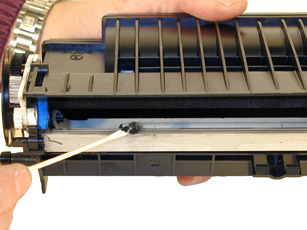
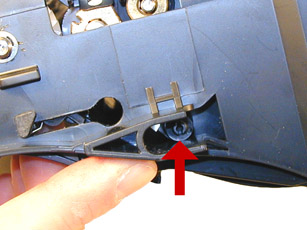
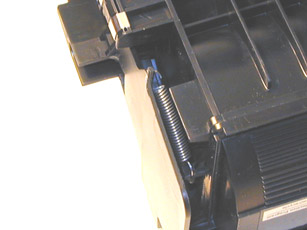
17) On the toner hopper, remove the Doctor Blade Spring by pressing
down on the center of the spring. See Figure 16
|
|
Figure
13 |
Figure
14 |
|
|
|
Figure
15 |
Figure
16 |
18) On the left side of the Developer Roller there is a small metal
copper colored bushing, take a small screwdriver, press the contact
plate down and pry the bushing off the shaft. See Figures 17 &
18
19) Remove the star drive gear from the opposite side of the developer
roller, remove the developer roller. The star gear has a very tight
fit. See Figure 19
NOTE: Always remove the Doctor Blade Spring before removing the
Developer Roller, failure to do this will allow the Doctor Blade
to slide down from its original position.
|
|
Figure
17 |
Figure
18 |
|
|
|
Figure
19 |
|
20) Remove the fill plug from the hopper. See Figure 20
21) Vacuum the Toner Hopper clean.
22) With a cotton swab dipped in alcohol, clean the Blue Developer
Roller seals located on either end of the developer roller section.
This also a good time to clean the bottom edge of the Dr. Blade.
See Figures 21 & 22
23) Carefully vacuum or blow off the Developer Roller, Be careful
not to touch the roller with your hands, or to damage this roller
in any way.
24) If the OEM developer roller spacers are damaged, they should
be replaced. The shims used on all previous Lexmark cartridges will
work here also. Damaged shims will allow toner to leak out of the
cartridge. See Figure 23
|
|
Figure
20 |
Figure
21 |
|
|
|
Figure
22 |
Figure
23 |
25) Place the keyed end of the Developer Roller into the cartridge,
and install the roller. Install the metal bushing. Turn the bushing
so that the oblong side locks into the spring contact. Install the
star gear, note that the gear and shaft are both keyed. Do not force
the gear on as it will be damaged. See Figures 24, 25 & 26.
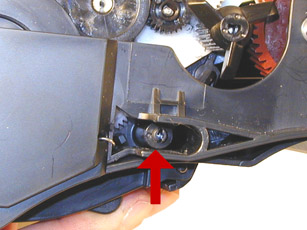
26) Install the Doctor Blade Spring. See Figure 27
|
|
Figure
24 |
Figure
25 |
|
|
|
Figure
26 |
Figure
27 |
27) Fill the hopper with the appropriate amount of toner. Install
the Fill Plug. See Figure 28
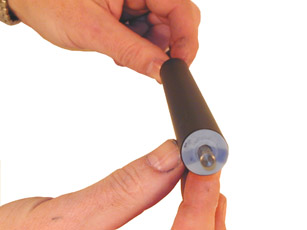
28) Lightly coat the drum with your preferred lubricant.
29) With the cartridge upside down and the waste chamber facing
you, place the OPC Drum into the cartridge with the white gear side
of the drum to the right side of the cartridge. Make sure that the
spring is facing down, and is in between the two slots. (The slots
are only on the right side). See Figure’s 29 & 30.
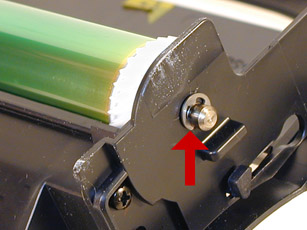
30) Install the Drum Axle pin into the large gear side of the drum.
This is the opposite side from where the axle was removed. The Axle
must be installed this way to prevent the axle from bending and
damaging
the drum ground contact located inside the drum. See Figure 31
|
|
Figure
28 |
Figure
29 |
|
|
|
Figure
30 |
|
31) Install the E-Ring on the end of the axle. See
Figure 32
32) Spin the drum for a few revolutions towards the waste chamber
to
ensure the drum and wiper blade are properly lubricated.
33) Make sure both springs are in their respective holes in the
cartridge side walls. See Figure 33
34) Take the Toner Hopper and install it straight in. Bend out
the side wall of the cartridge so that the top pins are able to
lock in place. Make sure that the two front pins are in their slots.
See Figures 34, 35, & 36
|
|
Figure
34 |
Figure
35 |
|
|
|
Figure
36 |
|
35) With spring hook, replace both springs on to the
Toner Supply Chamber. See Figures 37 & 38
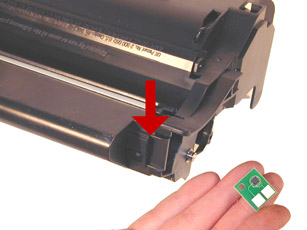
36) If this is a Prebate cartridge, the chip must
be replaced. Remove the screw, and remove the old chip. Install
the new chip, and replace the screw. See Figure 39
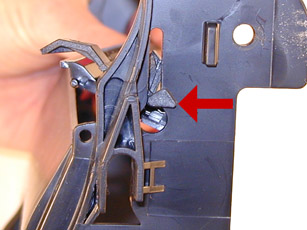
37) A shipping lock must now be installed. This lock should be
used even if you are going to hand deliver the cartridge. It will
prevent the toner hopper from coming in contact with the OPC Drum,
and causing damage to either the Drum or the Developer Roller. Press
the two red tabs into the sides of the cartridge as indicated. See
Figure 40
|
|
Figure
37 |
Figure
38 |
|
|
|
Figure
39 |
|
Running Test Prints:
Menu Settings Page:
1)Make sure that the ready light is on.
2)Press and release the “MENU” button until “Utilities
Menu” appears on the display
3)Press “SELECT”
4)Press and release the “MENU” button until “Print
Menu” appears on the display
5)Press “SELECT”
6)The menu settings page will print. If the machine is the network
version, an addition network settings page will also print
Print Quality Test Pages:
1)Turn the printer off.
2)Press and hold the SELECT and RETURN buttons, turn the printer
on.
3)Release the buttons once “PERFORMING SELF TEST” displays.
4)Select “Prt Quality Pgs”.
5)Three pages will print. Two graphics pages and an information
page.
If you have ever tried to run these pages from a T420 machine,
this is much, much easier!
Printer Trouble shooting
All the error messages below 900 are in English, and no explanation
is needed. All messages above 900 call for service. We will update
this as soon as the service manual is available.
Common toner cartridge problems:
Scratched drum this is shown by a very thin, perfectly straight
line that runs from the top to the bottom of the test page.
Chipped drum This will show as a dot or series of dots that repeat
3 times per page.
Light damaged drum This will show up as a shaded area on the test
print that should be white. Again this will repeat 3 times per page.
Bad wiper blade This will show as either a gray line approximately
1/8" thick, or as shading across the entire page. In either
case there will be a film of toner on the drum surface.
Weak Dr. Blade Spring This will usually show as shaded areas on
one or both sides of the page.
Changing the Printer Density
1)Make sure that the ready light is on.
2)Press and release the “MENU” button until “Quality
Menu” appears on the display.
3)Press “SELECT”.
4)Press and release the “MENU” button until “Toner
Darkness” appears on the display.
5)Press “SELECT”.
6)The settings can be changed from 1 to 10 with 8 being the default

|