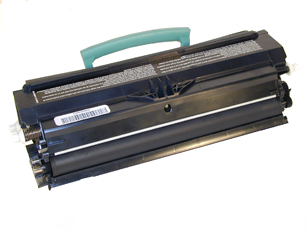
Re-manufacturing the Lexmark E240/340 Toner Cartridge
0372
The Lexmark E240/340 were introduced in January 2006. They are replacing the E230/330 series of machines. The E240 series cartridges are new, but backwards compatible to the E230/330 machines. As suppliers stocks run out only the new cartridges will be available.
Even though these new cartridges are almost identical to the newer E330 cartridges, there have been changes to the E330 cartridges made since they were covered back in November 2004. Those changes are also in the newer E240/340 cartridges and are covered here.
The new machines are based on a Lexmark 27-30ppm (depending on the printer), 1200 DPI engine. With a street price of around $199.00(January 2006) for the E240, these machines continue to be very popular. It should be noted that the new cartridges have chips with new code; the OEM chips are backwards compatible, but check with your supplier to make sure your chips are good for the new machines. New E230/240/330/340 chips are now available. There are also different chips used for different regions of the world. It is too soon to say for certain, but I think it is a safe guess that it is the chips that are different.
As with the E330, there are two cartridges used for this engine, a toner and drum unit. These machines also have standard and Return program (Prebate) cartridges and all have chips that shut them down. The Return chips must be replaced each cycle. It should also be noted that the OEM high yield cartridges only work in the E340/330 series, not the E240/230 series. A listing of the cartridges available as well as pricing follows. As simple as these cartridges are, there is plenty of room for a nice profit.
Old Cartridges:
Part# Type Yield List Price
12A8400 Std. Return cartridge 2,500 $74.00*
12A8300 Standard cartridge 2,500 $94.00*
12A8405 HY Return cartridge 6,000 $119.00*
12A8305 High Yield cartridge 6,000 $139.00*
New Cartridges For use in the USA and Canada
Part# Type Yield List Price
24015SA Std. Return cartridge 2,500 $74.00*
24035SA Standard cartridge 2,500 $94.00*
34015HA HY Return cartridge 6,000 $119.00*
34035HA High Yield cartridge 6,000 $139.00*
New Cartridges For use in Europe , The Middle East and Africa
Part# Type Yield
24016SE Std. Return cartridge 2,500
24036SE Standard cartridge 2,500
34016HE HY Return cartridge 6,000
34036HE High Yield cartridge 6,000
New Cartridges For use in the Asia Pacific Region
Part# Type Yield
34217HR Std. Return cartridge 2,500
34237HR Standard cartridge 2,500
34217XR HY Return cartridge 6,000
34217XR High Yield cartridge 6,000
New Cartridges For use in Latin America
Part# Type Yield
24018SL Std. Return cartridge 2,500
24038SL Standard cartridge 2,500
34018HL HY Return cartridge 6,000
34038HL High Yield cartridge 6,000
The Drum cartridge is used worldwide.
12A8302 Drum cartridge 30,000 $86.00*
*Pricing as of January 2006
Machines based on this engine are the:
Lexmark E240, E240n, E240t, E340, 342n
IBM InfoPrint 1512
How to take test prints as well as cleaning the printer are covered at the end of the article.
- Toner approved vacuum
- A small Common screw driver
- A Phillips head screwdriver
- Needle nose pliers
- Lexmark E340/330 toner 80g for the low yield, 170g for the high yield. (Preliminary weights testing is on-going)
- Small bottle of Acetone (Available from your local hardware store)
- Toner Magnet cloths
- Lint-free synthetic cotton 4"x 4" pads
- 99% pure Isopropyl Alcohol
- Cotton Swabs
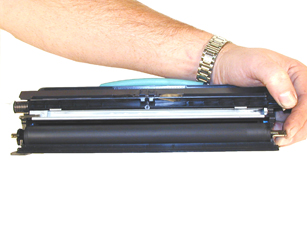
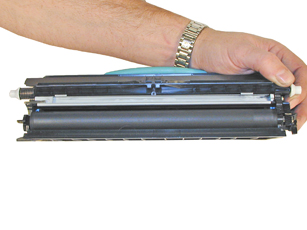
1) Remove the developer roller screw & cover. See Figure 1
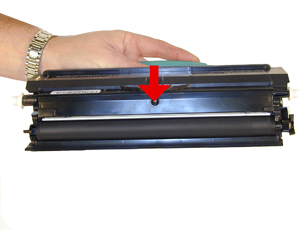
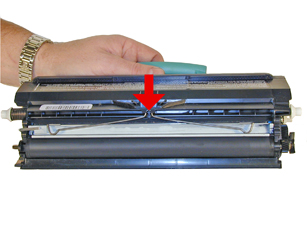
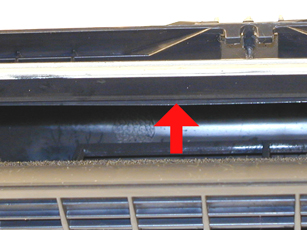
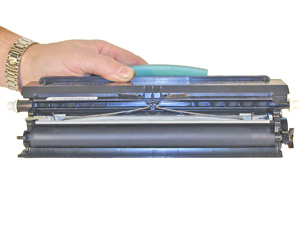
2) Remove the leaf spring. The dr. blade is a new type and may come loose. Try to keep it in place for now to keep the toner from pouring out. See Figure 2
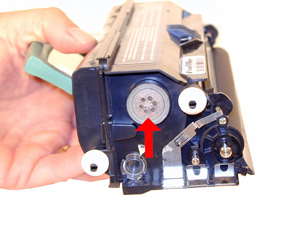
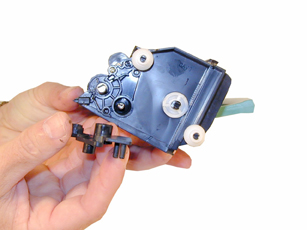
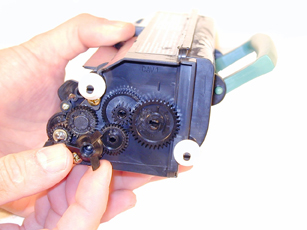
3) On the gear side of the cartridge, remove the propeller styled drive gear. This gear is on tight, and you may need a small screwdriver to pry it off. See Figure 3
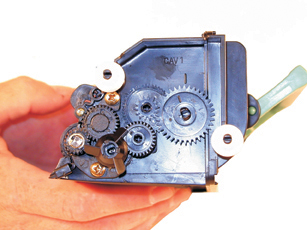
4) Remove the idler gear. See Figure 4
|
|
Figure 1 |
Figure 2 |
 |
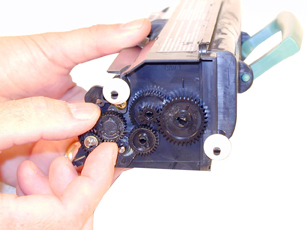 |
Figure 3 |
Figure 4 |
|
|
Figure
5 |
Figure 6 |
|
|
Figure 7 |
Figure 8 |
5) Remove the c ring from the developer roller shaft and the developer roller drive gear. See Figure 5
6) Remove the three remaining gears. Press the tabs on the gear shaft to release the gears. See Figures 6 & 7
7) Remove the 2 screws and the axle plate from the cartridge. See Figure 8
|
|
Figure
9 |
Figure 10 |
|
|
Figure 11 |
Figure 12 |
8) Remove the fill plug, and dump out any remaining toner. See Figure 9
9) Remove the developer roller. Clean the toner feed roller with compressed air if available. See Figures 10 & 11
10) Clean the Doctor Blade with a cotton swab and 99% Isopropyl alcohol. See Figure 12.
|
|
Figure
13 |
Figure 14 |
|
|
Figure 15 |
Figure 16 |
11) Wipe the developer roller with a clean lint free cloth, and re-install the developer roller. At this point we do not recommend that any chemicals be used to clean this roller. See Figure 13
12) Install the axle plate and two screws. See Figures 14
13) Install all the gears and the c ring. See Figure 15
14) Check to make sure the doctor blade is positioned correctly and install the leaf spring. See Figures 16 & 17
|
|
Figure
17 |
Figure 18 |
|
|
Figure 19 |
Figure 20 |
15) Re-install the developer roller cover and screw. See Figure 18
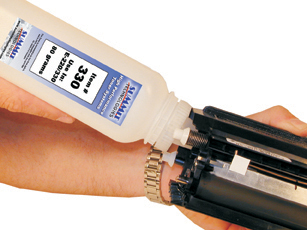
16) Fill the cartridge with the proper amount of E330 toner and install fill plug. See Figure 19
17) There is a small clear window located under the fill plug. Make sure this window is clean. It is used to determine toner low. See Figures 20
18) Replace the chip. Make sure the chip you have is for the proper brand. Each brand has its own chip. (Lexmark, IBM, Dell) See Figure 21
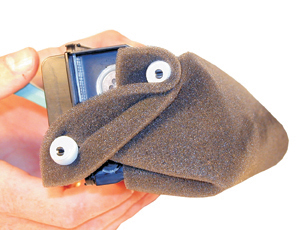
19) If the foam cover is available, wrap the cartridge as indicated. This foam helps protect the developer roller from damage. Aftermarket covers are in development. See Figure 22
Printing test pages E340 Series Only
1) Scroll through the menus to the utilities menu.
2) Select either the Print Menus, Print fonts, or Print Demo
3) Press the Select button
Printing Test Pages E240 Series Only
1) If the machine is installed on a PC, Click on Start-Settings-Printers
2) Select the proper printer
3) Click on File-Properties
4) Click on Print Quality Test Pages.
To run test pages on a printer with out a PC do the following:
• Turn off the printer
• Open the front cover
• Press and hold the CONTINUE button and turn the printer back on. All the lights will cycle
• Close the cover
• To Print the Configuration page, Press and hold the CONTINUE button until the lights cycle. The page will print out.
Cleaning the Printhead glass
Open the front cover and remove the toner and drum cartridges. Locate the glass printhead lens in a recess above the cartridge bay. Wipe the glass down with a lint free dry cloth. Do NOT use any type of chemicals on the glass. Re-install the cartridges and close the cover.
© 2003-2004 Summit Laser Products, Inc.
Any attempt to reproduce any part of these instructions without the written
consent of Summit Laser Products, Inc is prohibited. All registered trademarks
are the property of their respective owners.

|